Images are an important part of the site for the visually abled, and can be useful for those who aren’t, too. In this article, you will learn how to put images on your WordPress site, make them accessible to partially or fully visually disabled people, and optimize for SEO.
If you’ve ever taken pictures with a friend’s cellphone and asked him to send them via WhatsApp, you might have noticed a difference in the quality of the images. The same happens when you save a photo from Facebook to your computer. That happens because these services compress the images as much as they can, and this compression leads to a loss of quality.
The basics of online images you cannot put an original size image on the site. While Photoshop user have an easy way to export light files, those who don’t use it can look for an alternative image processing program, such as those on this list. [external link in Portuguese]
WordPress Media Library: where files are stored
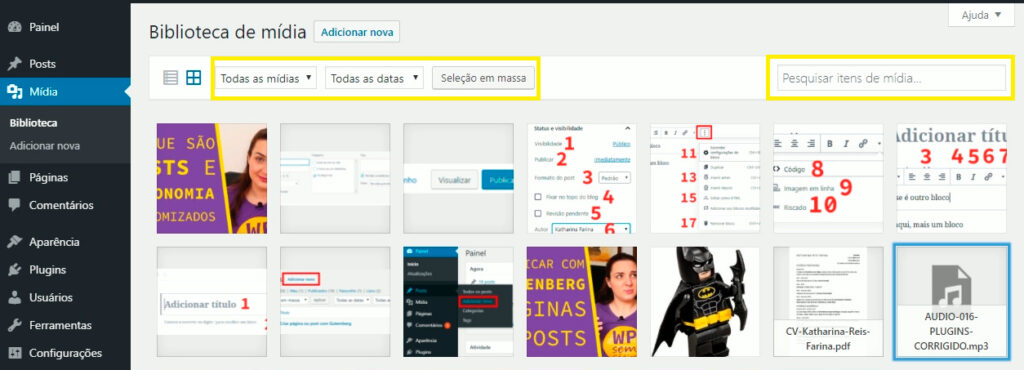
Now, let’s get into WordPress. In the left bar of the panel, you have “Media Library”, which is where WordPress stores all the files you upload. They can be images, PDFs, audios or even videos, although it’s better to embed videos from other sites to reduce the load on your server.
In the Media Library page, you can search for images by the search bar in the upper right corner, or by the month it is placed on the server, if you have chosen to organize your images by month in WordPress Settings. If you change your mind after clicking a button, you can use the tabs in the upper left corner.
Adding images to page or post
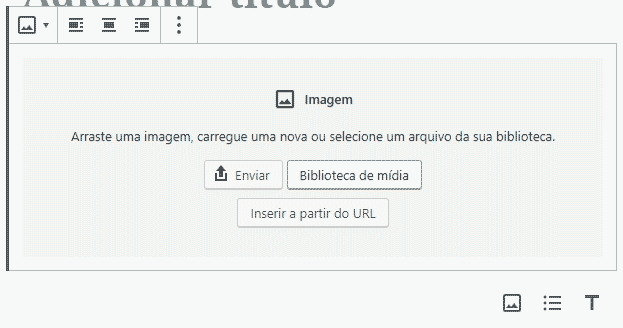
When inserting an image on a page or post, you can send it directly from the computer or cellphone on which you are creating the post, or access your media library.
Making images accessible
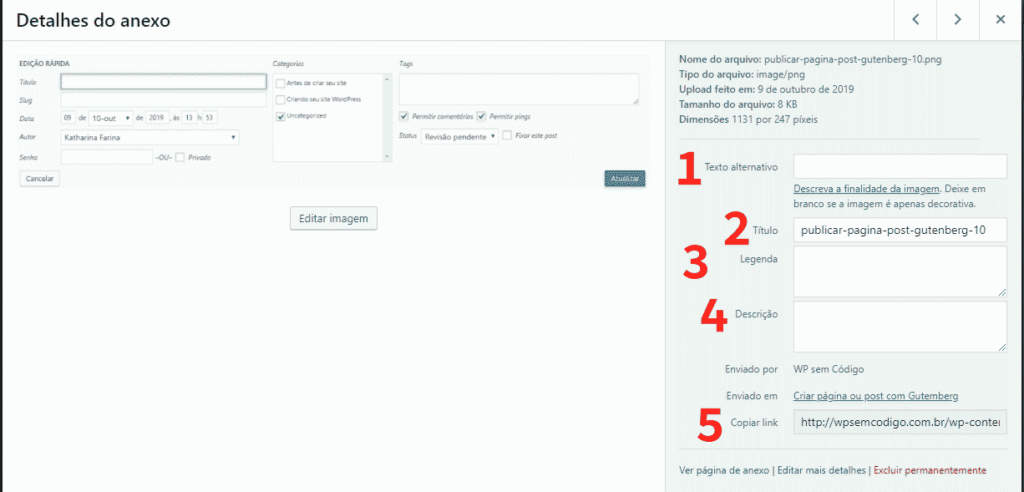
Once you have selected an image, either in the media library or to insert it on a page, you will see the “Details” tab with five fields below the image details: alternative text, title, caption, description and “copy link”.
Alternative text
Alternative text (1) is what the screen reader of the visually impaired user and the search engine robot read. We will understand when it should be filled out in this link that is just below the “alternative text” field.
If the image contains text, but the same text is very close, or is only there for visual effect, you don’t need to. An example is the cover images of articles: in the case of WordPress without Code, the text in the image is the title of the article, so there is no need. If you have a recipe blog and put a photo of the food on the cover image, you don’t have to. In cases where the text has a function in the image, like an icon, and is not written nearby, it needs alternative text. Especially if you have a link in the image: you need to inform which page the link is taking to.
For images with information, such as graphics, if the information is simple, it is best to put a brief description. If it is complex information, put that information in the text. Remember that alternative texts must be short and written for humans – it is not meant to be filled with meaningless keywords. Non-cohesive keywords are marked as spam by search engines.
The Accessibility Technological Center of the Federal Institute of Education, Science and Technology of Rio Grande do Sul has a great article specifying what information to put where [link in Portuguese].
Other fields
The next field, title (2), is just as important as the alternative text. This is where keywords come in, but only the essential ones; it is not to repeat in many different ways.
The caption (3) is the text next to the image that everyone can read. It is an interesting way to “release” alternative text when you are unsure whether an image is decorative. I use WordPress tutorials without code, because I like to point out the “interventions” I made in the image, such as circles, arrows and numbers.
The last field you can fill in is description (4), which does not influence SEO. What it does is show text on the attachment page, if you put that option in the image. Depending on the theme, it can also appear under the image, as the caption.
Then there is the link (5) of the image on your server, which you can only change if you click on “Edit Image”.
Editing images on WordPress
When you click on “Edit Image”, you open a page. The first field is the title (1), and right below it has a button to edit the link (2).
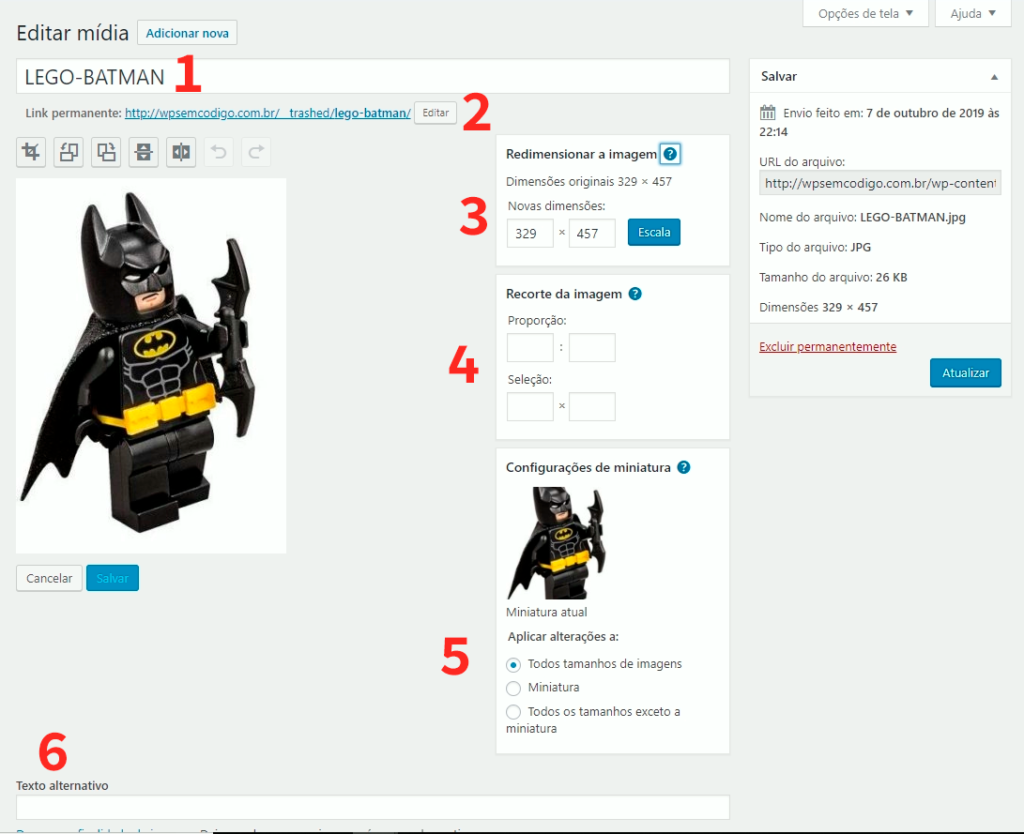
You can make basic edits to an image on WordPress itself, but I recommend only doing this as a last resort. WordPress already saves the images you put on the server in different sizes to create thumbnails, but you can resize (3) to the size you prefer, in addition to cropping the image in the proportions you want, rotate from 90º to 90º and even invert – place it upside down or mirrored (buttons above the image). It has an undo and redo button, in case you make mistakes, and you have to save the image after it’s done.
It is also possible to crop the image (4), choosing the proportion or how many pixels will be included in the crop; finally, you can apply the changes to the thumbnail of the new image.
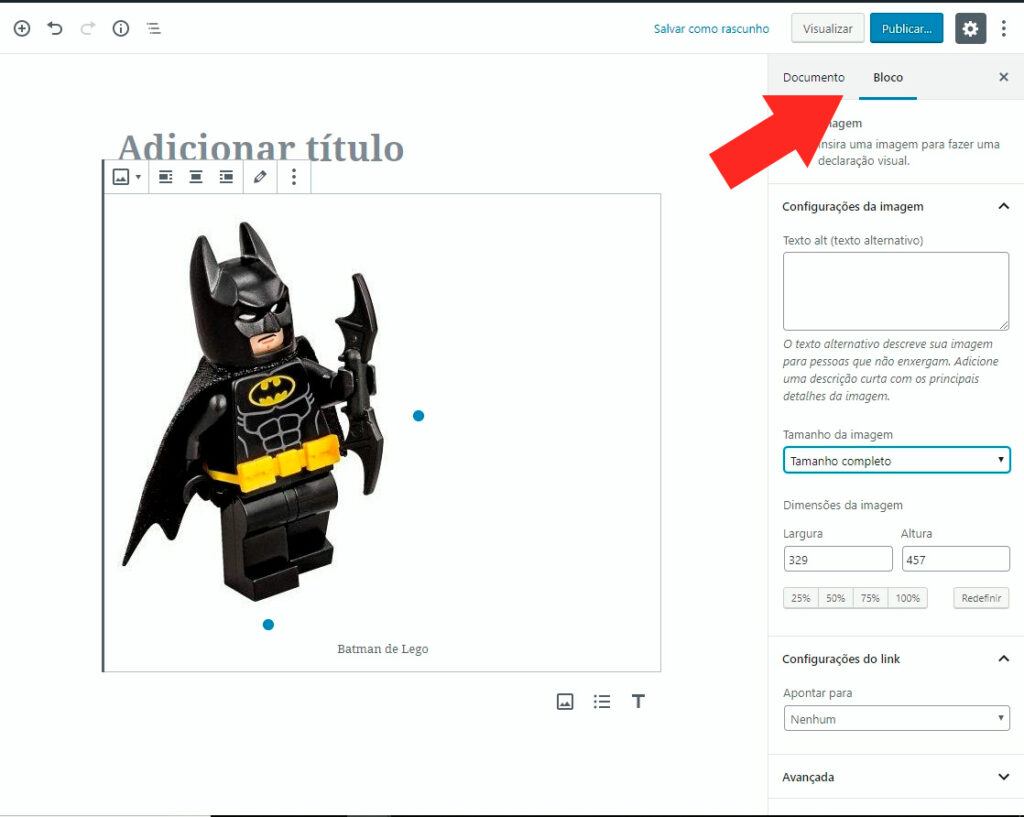
If you use the Gutenberg page and post editor, when you select an image, the fields appear in the block settings on the right of the page, as well as the option to resize.
To insert multiple images together, you need a gallery. You can use the WordPress gallery block, a gallery widget or download plugins that create more personalized galleries. We will have videos with gallery plugins in the future.
Free image banks for your WordPress site
If you read this until the very end, you deserve an extra tip: content blogger Fernanda Mafia posted a list with six free stock image banks on her Instagram. Some of them even let you publish the image without any credits – although it is always better to do that. I’ll start with the three I’ve used:
- Freepik: Has photos and vectors, both paid and free. Paid ones are better, but I’ve dealt with free ones for years. The visuals of the images are very commercial, and they ask you to give credit to the author – even when the author is clearly an account that gathers free material on the internet.
- Unsplash: I see this bank in somewhere in between commercial and artistic. It has a good selection, many categories and a search engine that works. They don’t require you to give credit to the photographer, but they encourage it.
- Nappy: After a while looking for stock images, you realize that you have a lot more white models than any other ethnicity. Nappy was created to offer photos with black models, balancing these websites in a way.
- Pixabay: also has free photos and vectors. I liked that it places the license next to the image for you to see right away.
- Pexels: photos and categories plus hipsters. It also has the most popular searches, which can help those who don’t have a lot of English.
- Gratisography: the group’s joker. It has fewer categories, but looks for more relaxed and weird photos – especially in the “whimsical” category.
Here’s a hint about the hint: these banks use keywords in English and sometimes in Spanish, so if you don’t know how to speak other languages, you can appeal to Google Translate to have the exact spelling of the word and synonyms.
Now tell me about your favorite image stock bank! And let me know if this article has helped you add images to your WordPress website. If you liked it, share it with your friends and colleagues. You can also follow us on social media to keep up with our latest content. Don’t forget: every article you read here has a corresponding video in WordPress sem Código’s YouTube channel.